Node-RED 0.20 is now available to install.
If upgrading, please read the upgrade instructions.
Community Survey
This release comes just as we launch our 2019 Community Survey.
We speak to lots of you in Slack and the Forum and love hearing about how Node-RED is being used. But we know there’s a much larger community of users and developers out there who are using Node-RED that we haven’t spoken to.
This survey is an opportunity for us to get a better understanding of who our users are, what they do with Node-RED and to help the project stay pointed in the right direction.
Please spare us 10 minutes of your time to fill in the survey here: https://tiny.cc/NodeRED2019Survey
All responses are completely anonymous unless you choose to share your contact information with us. If you do share your contact information with us, it is purely to allow us (the core Node-RED team and no-one else) to follow-up on your responses.
The survey will be open until mid-April at which point we’ll compile the results into a report to be shared on the blog here.
Take the survey today! - and spread the word to your friends and colleagues to help us reach as wider an audience as possible.
Unlike previously releases, we’ve already done a few beta releases of 0.20 over the last couple of months. This has allowed us to get more feedback on the new features and flush out lots of edge cases before making it more widely available.
Thanks to everyone who tried the beta - it’s definitely an approach we’ll continue with future releases.
- Node.js version support
- Runtime/Editor split
- Subflow Enhancements
- Quick Add dialog
- Wiring link nodes
- Performance improvements
- Node edit dialog changes
- Working with tabs
- Editor
- Runtime
- Nodes
Node.js version support
Node-RED 0.20 requires Node.js 8.x or 10.x - we no longer support running it on anything earlier.
Runtime/Editor split
The 0.20 code base has gone through a significant restructuring so that it is now split across multiple modules. Whilst this shouldn’t mean much for the majority of end-users, it is a major step towards version 1.0.
Part of this work includes putting together documentation for the various modules and the APIs they expose. This is now available here.
There’s lots still to document about how these modules can be used individually. If that’s something you’re interested in seeing, please get in touch.
Subflow Enhancements
Subflow Status
There is a new option to add a ‘status’ output to a subflow. This can be used to update the Status of subflow instance nodes. With subflows currently, if any node inside the subflow emits a status event, it would pass up to the flow containing the subflow instance - but it wouldn’t appear to have come from the subflow instance. Now, if this new status output is used, only messages passed to it will get passed to the parent flow and they will be properly identified as having come from the subflow. This gives a lot more control and flexibility of working with status events and subflows.
Adding a status output:
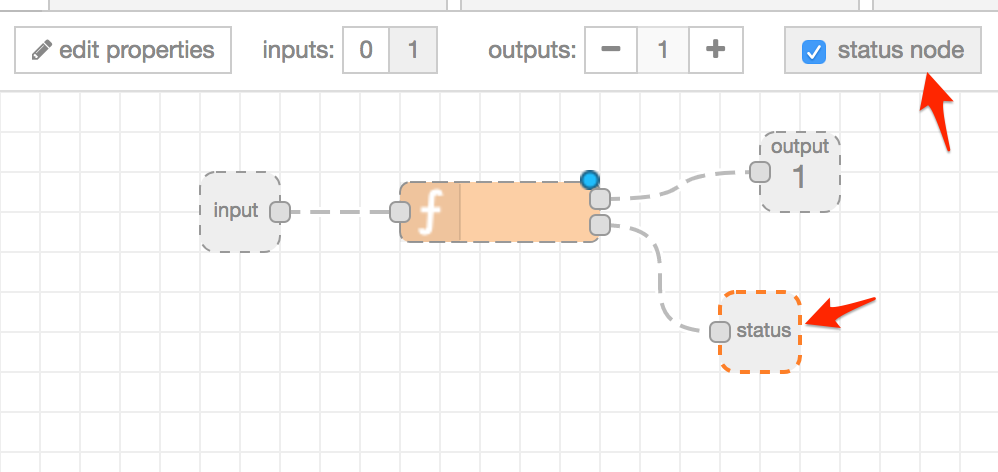
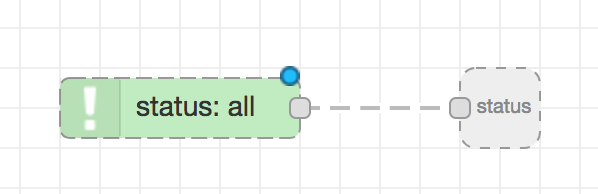
Status appears against the subflow instance node just like any other node with status
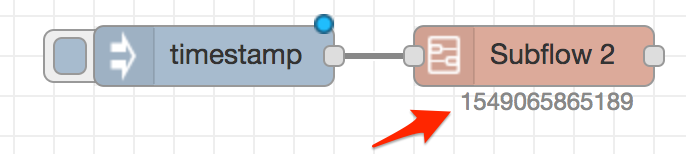
Redirecting status events from inside a subflow
Accessing parent flow context
When using context within a subflow, it is now possible to access the context of the flow the subflow instance is on. This is done by prepending the context key name with $parent.. For example, if a flow has a context value of foo, a subflow could use flow.get("$parent.foo"); to access it.
Accessing parent flow context in a Change node

Subflow Instance properties
It is now possible to define environment variables in a subflow. These are values that any node in the subflow can then reference in the same way as they can normal environment variables:
- by setting a node property to
$(ENV_VAR_NAME) - by choosing the
envtype in a typedInput - by using
env.get('ENV_VAR_NAME')in a Function node
These properties can be set on the Subflow template, but also on individual instances of the subflow. That means you can design a subflow that can be customised on a per-instance basis. Unlike the process-wide environment variables which can only be Strings, the env vars defined on a subflow can be multiple types - string, number, boolean, JSON, Buffer or even a reference to another env-var. This last option means you can create composite env-vars made up of other env vars… and oh my just think of the possibilities.
When a flow references an environment variable, if it is not defined on the subflow (or the subflow containing the subflow, or the subflow containing that subflow… and so on), it will fallback to the process-wide environment variables. If it isn’t set there either, it will return an empty string "" - not undefined.
Adding env vars to a Subflow template
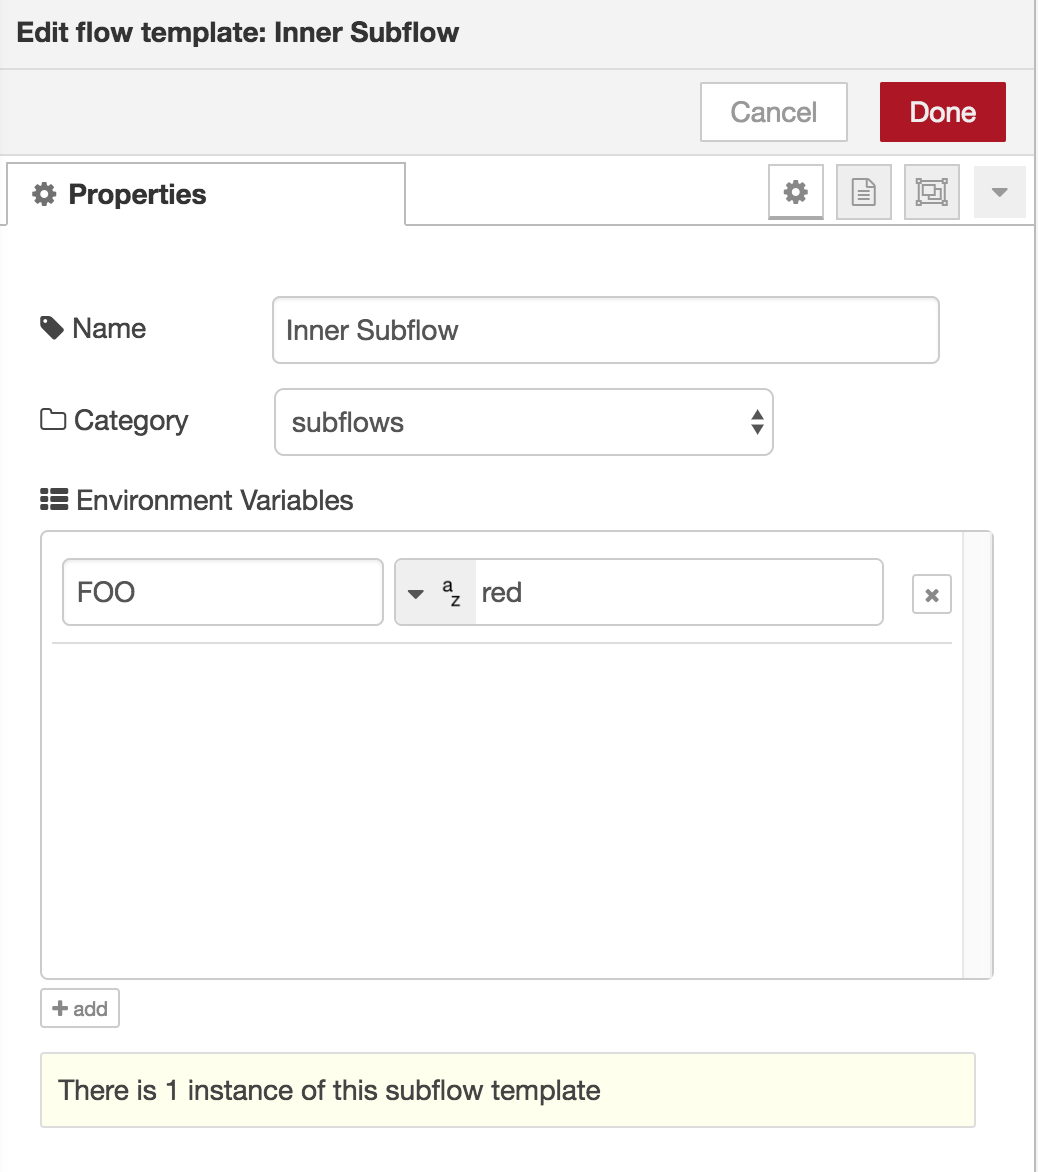
Here an environment variable FOO is defined with the value "red".
Adding env vars to a Subflow instance
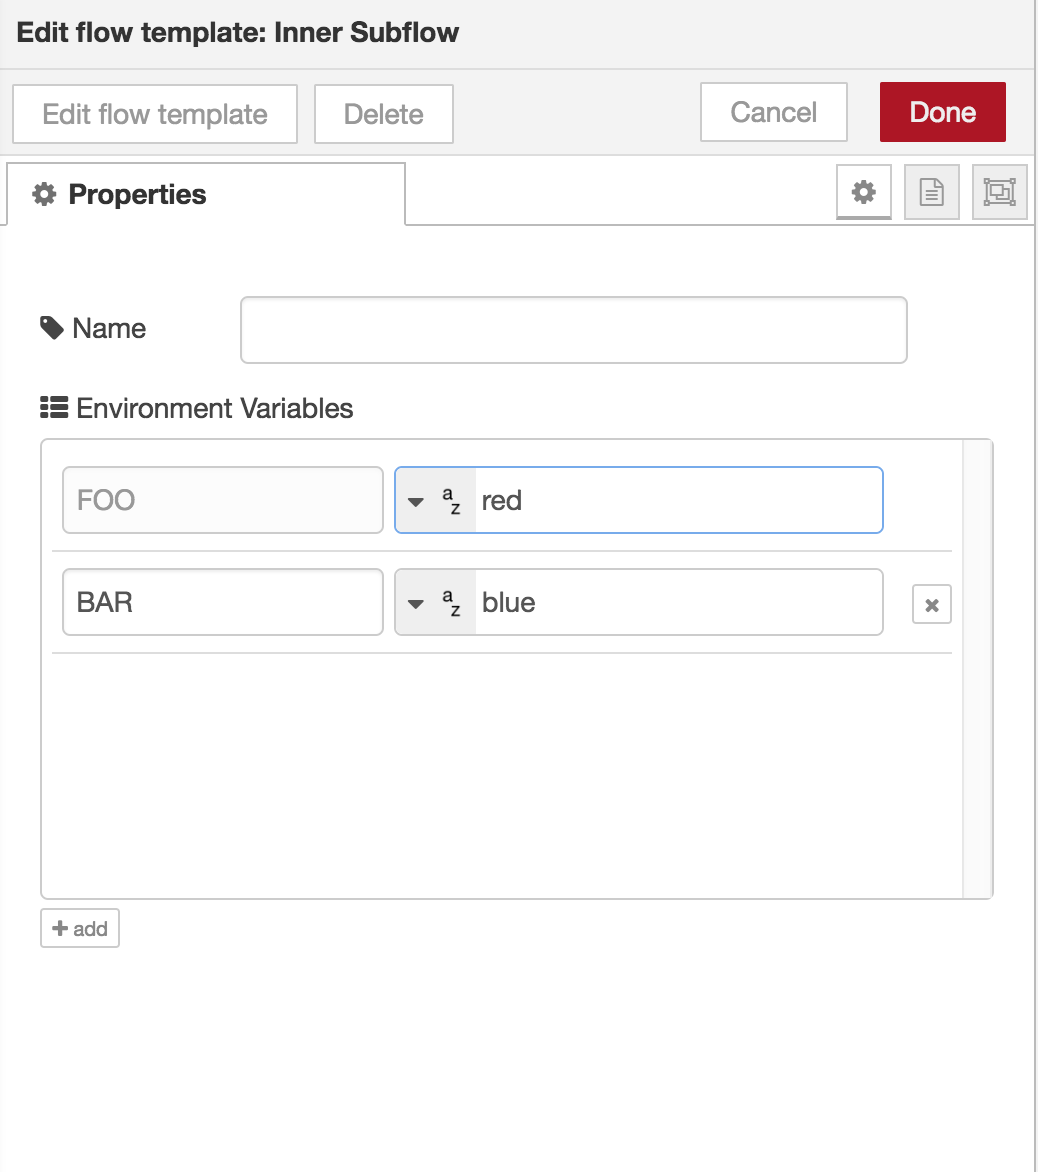
When editing the subflow instance, the env var table lists the env vars defined on the subflow template. In this image you can see FOO is listed. Its value can be customised for this instance - if you do customise it, a button appears to the right that lets you revert it back to the value the parent subflow defined. You can also add new env vars just for this instance - as shown above with BAR.
These new subflow features address a lot of common requests and feedback we get about them. We think this will make them a much more powerful tool within Node-RED.
Quick Add dialog
- The quick add mode in the editor (Ctrl/Cmd-Click) has had a couple updates. It now displays a placeholder node while the dialog is open. If you use Ctrl/Cmd-Enter to confirm the node to add, it adds the node and keeps the dialog open so you can add another node. This means you can quickly add a chain of nodes entirely from the keyboard (after the initial Ctrl-Click to open the dialog).

Wiring link nodes
When you select a Link node it now shows an extra port from which you can click and drag a wire to another Link node in order to join them. As before, these link wires are only displayed when you have a link node selected.
Performance improvements
The Change, Switch and Join nodes have had some performance improvements applied following a performance regression in 0.19 - particularly if they interact with context or use JSONata expressions.
For example, given a Change node using JSONata to calculate payload*2, on my
laptop, in 0.19.5 it takes ~12 seconds to process 65k messages (5k msgs/s). In
this release that now takes ~5 seconds (12k msgs/s).
Node edit dialog changes
The edit dialog for nodes has been reworked as a set of tabs rather than collapsible sections. This means we can add new sections to the dialog without losing valuable vertical space.
Node description
One of these tabs is a description field so you can add markdown-formatted help to any node. The contents will get displayed in the Info sidebar when you select the node.
To help with the markdown formatting, a new toolbar has been added to the dialog. It can also be expanded to a full-screen editor with a preview of formatted text.
Node icon
With 0.19 we introduced the ability to customise a node’s icon. This has been expanded to include selecting from the range of icons provided by Font-Awesome v4, excluding any brand-specific icons.
Working with tabs
New flow tabs can be added by double clicking on the tab bar. The tab will get inserted where you click - such as in between two existing flows.
Cmd (or Ctrl) - Clicking on a tab selects it. You can select multiple tabs. Once selected, pressing delete will delete the tabs.
Opening the export to clipboard dialog (from the menu, or Cmd/Ctrl-E) will let you export the selected tabs.
Editor
- When you convert a selection of nodes into a Subflow, the nodes will get moved back up to the top-left corner of the subflow tab.
- You can delete individual context entries in the Context Sidebar
- You can select Config nodes in the Config node sidebar, Ctrl-Click to select multiple. Pressing delete will delete the selected config nodes - easier than dbl clicking to open the dialog for each one.
- When you kick off either a git push/pull in the Projects sidebar, or an install/remove of a node from the Manage Palette dialog, you’ll see a button to ‘view log’. This will open the new Event Log (also accessible from the menu, View->Event Log). This lets you see more log output from the underlying git/npm commands those actions run.
- The Import from Clipboard dialog lets you upload a file rather than paste from the clipboard. It also does a better job of highlighting errors if you provide invalid JSON.
- The Export to Clipboard dialog lets you download the flow as a file, rather than copy to clipboard.
- A new ‘Restart Flows’ option has been added to the deploy menu - this causes the runtime to reload its active flows from storage and restart them.
- The Manage Palette dialog will refuse to install a module if it provides a node type that is already installed.
Runtime
- Add
--safemode flag to allow starting without flows running. This can be used if a flow is causing Node-RED to crash - starting in safe mode will allow the editor to be used to modify the flow and then deploy the change to take it out of safe mode. - Add setting-defined accessToken for automated access to the adminAPI
- Allow a project to be loaded from the command line - specifying the project name where you would provide the flow file name will load that project.
- A new setting has been added,
exportGlobalContextKeysthat can be used to prevent global context values set byfunctionGlobalContextfrom being list in the context data sidebar. The default value provided in the runtime settings file isfalse, so new installs will not see the values in the sidebar. Existing installs without this setting will still see them.
Nodes
- The Catch node has a new option to only handle node errors that have not been caught by another catch node. This means you can have catch nodes targeting specific nodes in a flow, and then one that catches everything else.
- The HTTP Request node can optionally automatically encode msg.payload as query string parameters for a GET request. It also has a new option to url-encode cookies (if, in rare circumstances, they need encoding rather than leave as plain text). This node also now supports Bearer and Digest authentication modes.
- The MQTT In node can now be configured to assume messages it receives are JSON and to emit the parsed object. That will save you from adding a JSON node after your MQTT In nodes if you are sure that everything you receive will be valid JSON. If the node receives something that isn’t valid JSON, it’ll log an error that can be handled with a Catch node.
- The status messages emitted by the TCP/Websocket nodes when clients connect and disconnect now include more information about the connecting/disconnecting client.